1. WEB.XML 설정
1-1) 리스너 등록, 루트 컨텍스트 등록
  <!-- 리스너로써 루트 컨텍스트에 정의 되어 있는 것들을 모든 서블릿과 필터가 공유할 수 있게 해준다고 함 -->
	<context-param>
		<param-name>contextConfigLocation</param-name>
		<param-value>
			classpath:/spring/root-context.xml
		</param-value>
	</context-param>

	<!-- 리스너로써 루트 컨텍스트에 정의 되어 있는 것들을 모든 서블릿과 필터가 공유할 수 있게 해준다고 함 -->
	<listener>
		<listener-class>org.springframework.web.context.ContextLoaderListener</listener-class>
	</listener>
1-2) UTF-8 인코딩
<!-- UTF-8 인크딩 -->
	<filter>
		 <filter-name>encodingFilter</filter-name>
		 <filter-class>org.springframework.web.filter.CharacterEncodingFilter</filter-class>
		 <init-param>
			 <param-name>encoding</param-name>
			 <param-value>UTF-8</param-value>
		 </init-param>
	 </filter>

	 <filter-mapping>
		 <filter-name>encodingFilter</filter-name>
		 <url-pattern>/*</url-pattern>
	 </filter-mapping>
1-3) DispacherServlet으로 앞단에서 요청정보를 핸들링 해줌
<!-- Processes application requests -->
	<!-- 서블릿 설정 -->
	<!-- DispatcherServlet으로 앞단에서 요청정보를 핸들링 해줌. 서블릿 설정을 여러개 할 수 있음 -->
	<servlet>
		<servlet-name>appServlet</servlet-name>
		<servlet-class>org.springframework.web.servlet.DispatcherServlet</servlet-class>
		<init-param>
			<param-name>contextConfigLocation</param-name>
			<param-value>classpath:/spring/appServlet/servlet-context.xml</param-value>
		</init-param>
		<load-on-startup>1</load-on-startup>
	</servlet>

	<!-- appServlet에 대한  url-pattern을 정의 -->
	<servlet-mapping>
		<servlet-name>appServlet</servlet-name>
		<url-pattern>/</url-pattern>
	</servlet-mapping>
2. root-context.xml
<?xml version="1.0" encoding="UTF-8"?>
<beans xmlns="http://www.springframework.org/schema/beans"
	xmlns:xsi="http://www.w3.org/2001/XMLSchema-instance"
	xsi:schemaLocation="http://www.springframework.org/schema/beans http://www.springframework.org/schema/beans/spring-beans.xsd">

</beans>
처음에는 아무 정보도 없다
향후 DB, LOG CONFIGURATION 정보 들어감
3. servlet-context.xml
Dispatcher 서블릿과 관련된 설정을 한다.
View 지원 bean을 설정한다. 어노테이션, 리소스 디렉토리, ViewResolver에 관한 설정들이 있다.
<!-- Enables the Spring MVC @Controller programming model -->
	<!-- Spring MVC @Controller 프로그래밍 모델 활성화  -->
	<annotation-driven />


	<!-- Handles HTTP GET requests for /resources/** by efficiently serving up static resources in the ${webappRoot}/resources directory -->
	<!--  HTML 리소스 디렉토리 정의 -->
	<resources mapping="/resources/**" location="/resources/" />


	<!-- Resolves views selected for rendering by @Controllers to .jsp resources in the /WEB-INF/views directory -->
	<!--  ViewResolver로 jsp와 name 을 매핑 -->
	<beans:bean class="org.springframework.web.servlet.view.InternalResourceViewResolver">
		<beans:property name="prefix" value="/WEB-INF/views/" />
		<beans:property name="suffix" value=".jsp" />
	</beans:bean>

    <!-- 베이스 패키지 하위 모든 어노테이션을 스캔해서 빈으로 등록하겠다는 것 -->
	<context:component-scan base-package="secretary" />
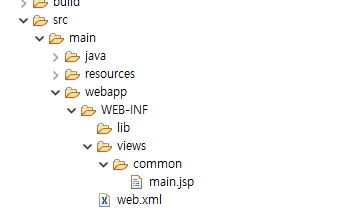
4. Deployment Assembly

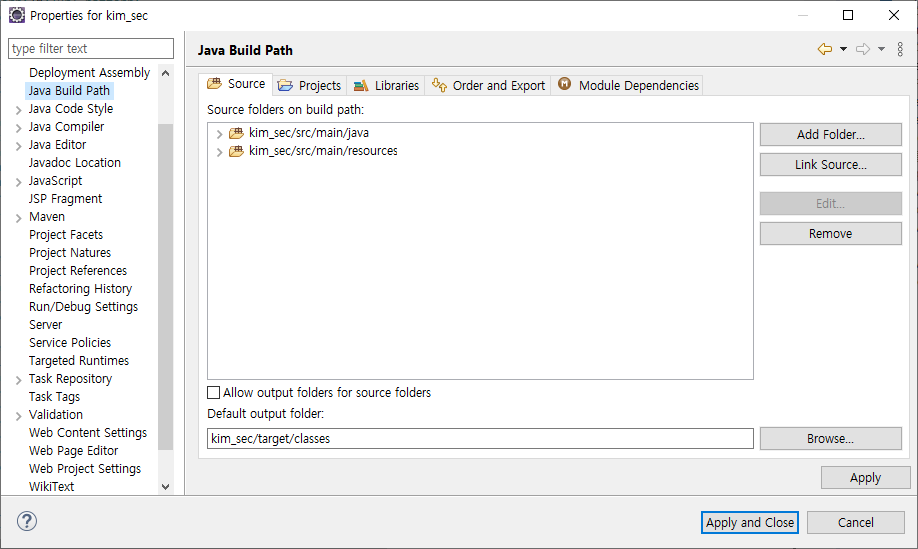
5. Java Build Path

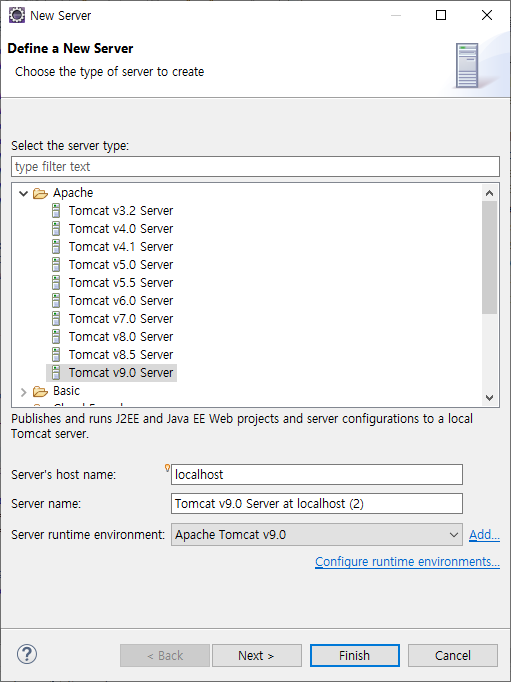
6. Tomcat Server 등록
Apache Tomcat® - Welcome!
The Apache Tomcat® software is an open source implementation of the Java Servlet, JavaServer Pages, Java Expression Language and Java WebSocket technologies. The Java Servlet, JavaServer Pages, Java Expression Language and Java WebSocket specifications ar
tomcat.apache.org
Server Tab > New > Server


Finish
7. Controller 등록
package secretary.common.controller;

import java.util.Locale;

import org.springframework.stereotype.Controller;
import org.springframework.ui.Model;
import org.springframework.web.bind.annotation.RequestMapping;

@Controller
public class MainController {

	@RequestMapping(value = "/main.do")
	public String main(Locale locale, Model model) {
		System.out.println("=======>main");

		return "common/main";
	}
}
8. jsp 등록

<%@ page language="java" contentType="text/html; charset=utf-8"
    pageEncoding="utf-8"%>
<!DOCTYPE html>
<html>
<head>
<meta charset="utf-8">
<title>Insert title here</title>
</head>
<body>
  Hello World!!
</body>
</html>
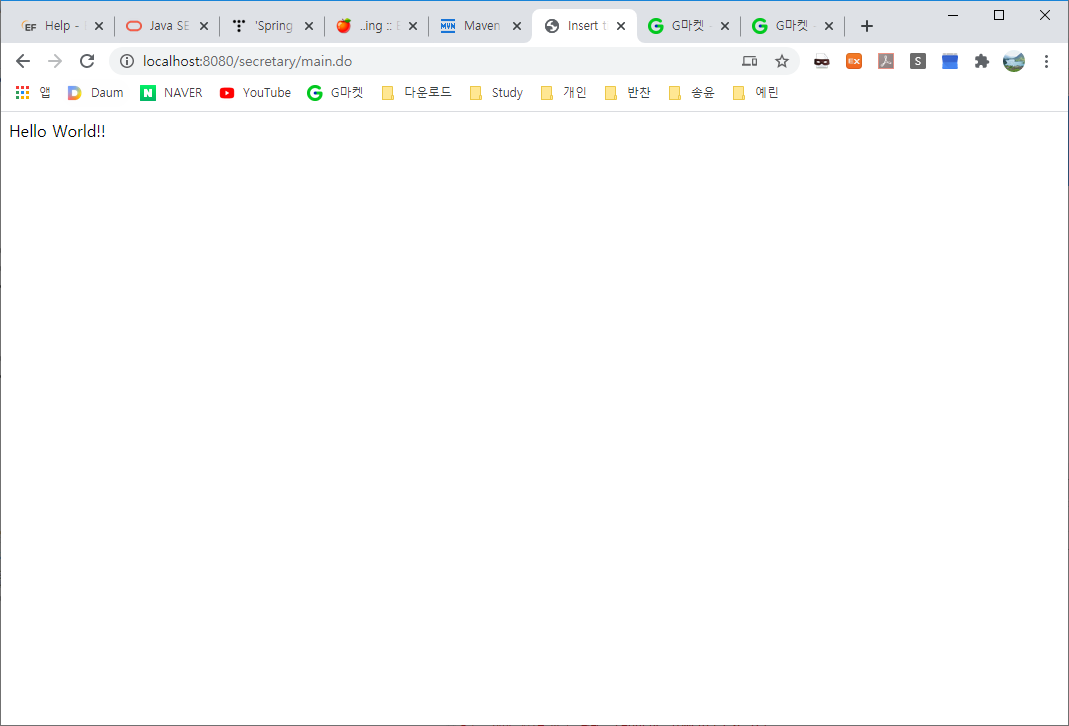
9. 접속
http://localhost:8080/secretary/main.do

'개발 > 개발환경설정' 카테고리의 다른 글
| Interceptor 설정 (0) | 2020.03.17 |
|---|---|
| Aspectj + 어노테이션으로 로그남기기 (0) | 2020.03.17 |
| LOG4J 설정 (0) | 2020.03.17 |
| MySQL 연결 (0) | 2020.03.16 |
| 개발환경설정 (0) | 2020.02.15 |


